

Make your Public Portal "The Talk of The Town" with Customizations
- CDI

- Aug 27, 2025
- 3 min read
By Kyle Knebel
August 2025 Consultants Corner
Laserfiche Cloud’s Public Portal Designer lets you easily build custom searches making it easier for users to find content.
This month’s article will show you how to create a Custom Search in Laserfiche Cloud.
Let’s build!
Step 1: Log in as a user with Public Portal Administrator access rights.
Note: To enable Public Portal Admin rights, select the User under Accounts> Users, then scroll to the bottom of the properties window to the “Access Rights” section. Set the value to “Allow”, and then press the Save button.

Step 2: Back on the top-right corner, use the App Picker to navigate to the “Public Portal Designer.”

Step 3: Go to the Welcome Page and Click on the Search Forms tab. Then press the + symbol to add a new Search Form.

Step 4: Give the Form a name (Description is optional but suggested)

Step 5: The Designer will launch, and you will have 4 preset options and a template to use.

Step 6: Drag one or more of the design elements to the “canvas” on the right.

For example, the Date element and two fields from the Vendor Files template were added to the search form.

Step 7: Each field can be customized. Here’s where it gets interesting! Even though a field has been added, you can customize the way it works, unlike its template definition. In the Basic Details panel, the input type can be changed from Test to List, and if you make it a list, you can enter just the list items you want, not necessarily the entire list items!

Additionally, the list “display options” can be set to one of three ways of display.

Also, each defined list item can display a text value but would have a hidden value used for the actual searching. If the field you are using is a list field, the defined list here does not even have to match THAT list! It could be a short list of just a few selected values from the entire normal list choices.

Using the Preview button at the top-right of the designer window, the custom search form can be checked.

Step 8: Click on the “Seach Results” tab to configure the logic used for performing the search. By default, searches will return documents containing entries that meet the criteria of any of the searches performed by the user. For example, if a search form contains both a creation date search and a field search, and a document only matches on the field search, it will be returned. However, you can modify your search constraints to perform the searches differently.
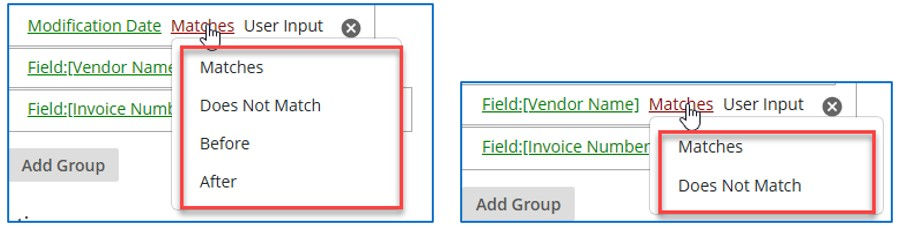
Note: The purple and red colored items can be clicked to modify their logic.

The purple “Gouping” logic has two options.

The red “Matching” options will be different depending on the type of field. Date fields get an additional two choices.
Step 9: Click the Save button when finished modifications.
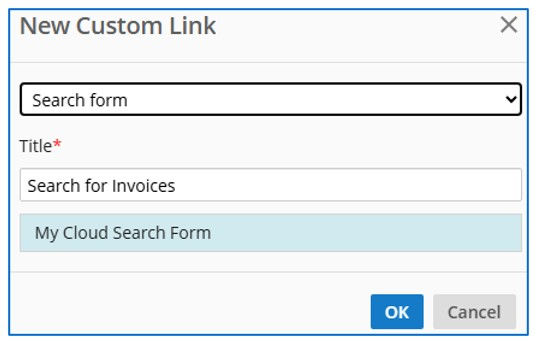
Step 10: To add the newly created Search Form as a “Custom Link” on the Welcome Page. Click on the + button on the Custom Links tab and configure the link’s name (Text), the type (Search Form), and Search form (choose from the list of available). Click OK and you are done!

Name the new custom link with a “title”, indicating what the search is doing. For example, “Search for Invoices”. Click OK and the search will now be visible as a custom link on the main Portal page.
Step 11: As the last step, save the changes to the Welcome Page by pressing the blue Save button at the bottom of the designer.

Step 12: check the Public Portal live site to make sure that the link looks good and works.

You’ve now built a custom search for users to easily find content on your Laserfiche Cloud Public Portal!


Comments