

Creating Your First Lookup Table in Laserfiche Cloud
- CDI

- Nov 20, 2025
- 3 min read
Updated: Dec 15, 2025
By Kyle Knebel
Consultant Corner – November 2025
This month’s article will show you how to quickly and easily create a lookup table in Laserfiche Cloud for use with a Forms business process or a workflow. Starting with a spreadsheet or tabular data, like in a .CSV file, you can use this data throughout Laserfiche Cloud Process Automation.
Let’s build!
Understanding Lookup Tables
A Lookup Table is ideal for data that doesn’t change frequently. Why? If the source data is a locally stored file, you will need to manually update the existing data, which will overwrite the previous data. Ensure you use a file with the same columns and data types, such as text and number (Integer). If the columns and data types differ, you risk breaking the lookup rules that previously worked.
Step-by-Step Instructions
Step 1: Log in as a User with Process Automation Privileges
To enable Process Automation privileges, select the User under Account > Users and then choose the appropriate username under the “Users” tab.

Step 2: Edit User Properties
Click on the User account to edit their properties. Scroll down to the “Access Rights” section. Expand the “Process Automation” section and click the radio button to allow the user to be a “Process Administrator.”
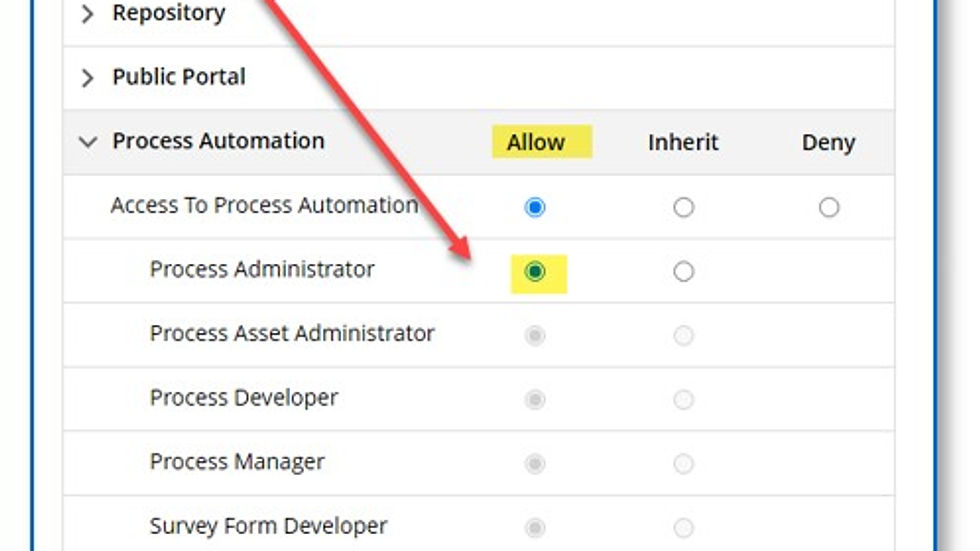
Press Save.
Step 3: Navigate to Process Automation Overview
In the top-right corner, use the App Picker to navigate to “Process Automation > Overview.”

Step 4: Access Data Management
In the “Tools” center column, click on “Data Management.”

Step 5: Create and Update Lookup Tables
Here, you can create and update lookup tables.

Step 6: Create a New Lookup Table
Select New > Lookup tables. Give the new table a name (without spaces), then click the “Choose File” button to upload your spreadsheet or CSV file.
Note: The first row of the spreadsheet should contain the column names.

Step 7: Check Options Boxes
Once the file has been chosen, check any options boxes:
Enable for Dynamic Fields: This allows the lookup table to be used as a data source for Laserfiche templates and fields when configuring dynamic fields.
Read-Only Access to Data: This option prevents modification of lookup table values.
Preserve Whitespace: When not selected, Laserfiche will trim leading and trailing whitespace and normalize internal whitespace to a single space character.
Step 8: Confirm Data Format
Click Next to view the confirmation window. This allows you to verify that the uploaded data looks correct and is in the right data type format.
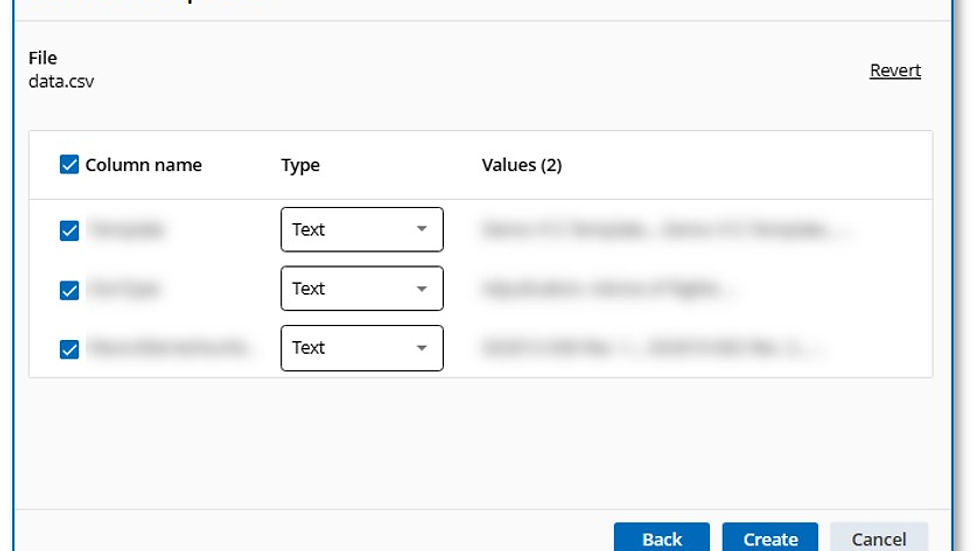
Step 9: Create the Table
When satisfied that the data looks correct, press “Create.” The table will then be displayed with its columns and data. The Update and Download buttons are available in the left corner.
Note: If you lose the original data file, downloading the lookup table data will result in a .ZIP compressed file containing a .CSV file.

Utilizing Your Lookup Table
With data in a lookup table, you can create queries against the information. A query can be run in a Workflow or used to display information in a Business Process form.
If you have the table open, you’ll see the information panel on the right side of the screen. Clicking on the blue “Create a lookup table query” link will open a dialog box where you can begin building a custom Select, Insert, Update, or Delete query.
For documentation on how to build a Query, use this link to the Laserfiche Cloud “Getting Started with Queries” help topic here.

Benefits of Using Lookup Tables
Laserfiche Cloud Lookup Tables are a great way to help automate processes like Workflows or Business Processes. They apply decision-making logic effectively. You can also use a lookup table to show lists of choices in a Template with Dynamic Fields.
Try one today!


Comments