

Laserfiche Cloud Collections - Thankful for More...


By Kyle Knebel
Consultant Corner – November 2026
Laserfiche’s Cloud repository Web Client has a recently added way to organize you own documents or folders regardless of where they actually live in the respository folder heirarchy.
The Collections area includes Starred Entries, Recently Opened Documents and Personal Collections. In this article we are going to focus on Personal Collections. Every user can create their own personal collections, which have no effect on repository content. You can even use AI “Directed Agents” to create, add or remove entries from collections.
Let’s take a look!
Here are a few examples of where Collections might be useful.
Documents related to a project
Case or investigation working set
Temporary research collection
Frequently referenced documents

Since personal collections are not a part of the folder tree, adding entries to them has no effect on the document's folder location. Any user can create collections. And collections are uunique to each user.
Select the “Collections” header on the left folder pane.
Click the Add Collection button () at the top right toolbar below your username and provide a name for your collection. You can also right-click on the Collections header and choose the “Add Collection” pop-up.

Now search for documents or folders, then select them for addition to the Collection you just created. You can even create a new collection on-the-fly when right-clicking on selected entries from the pop-up dialog as seen below. Or just choose to add the selected entries to the named collection that already exists.

Entries in a collection can be removed, although the entries will remain in the repository in its folder location.
To Remove entries from a collection, select the entry and press the Remove from Collection button in the top right corner of the web page. Or you can right-click on the entry and select the “Remove from Collection” option.

Collections themselves can also be Renamed or Removed.

Directed Agents with Collections using Smart Chat
Using Cloud AI, you can add entries to a collection or even create a new collection and add them with just some simple typed instructions in the AI chat window.
Click on the AI icon to open the chatbot window. In “Agent” mode, you can specify which documents to act on and direct them to be put in a collection or collections.
Make sure you are in agent mode. The icon below the chat box area will indicate “Ask” as its default mode. Click on the icon to switch it to “Agent” mode

For example, you could ask Cloud AI to find a set of documents like “Find all documents in the selected folder”. The AI chat window will show a list of documents, but also a link to Open the search results.


You could then tell Laserfiche AI to put the documents returned in the search into a new personal Collection.

The Agent will confirm if you want to do this. Assuming you have Browse rights to the entries, they will be added to a new personal Collection.

Press Confirm to let Cloud AI do this for you.
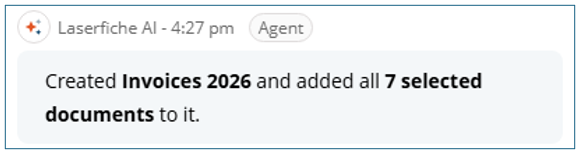
As you can see, the collection appears and the entries are listed in that new collection.

Note: Cloud AI Agents can only do tasks that your user account has rights to normally do in the repository. Laserfiche Cloud AI will respect the existing user and repository security settings.
We hope you enjoyed learning about Laserfiche’s Collections options in the Cloud Web Client.
Happy Thanksgiving!


Comments